|
|
|
1. INTRODUCTION |
|
Applets (small applications) are one of the most interesting features of Java. Applets are comparatively easy to understand, however, we do first have to digress briefly to consider WWW mark up languages (namely HTML). Strictly speeking this is not part of the syllabus for this module (Introduction to Object Oriented programming in Java), however you cannot use an applet without embedding it in a WWW page. Therefore some (slight) knowledge of HTML is necessary. Thus, we will commence in Section 2 by presenting the minimum amount of HTML required to incorporate an applet into a WWW page. We will then go on, in Section 3, to present our first applet. At the end of this section you will know all that is required to create simple (GUI style) applets. |
2. A BRIEF NOTE ON HTML |
|
Web pages are typically created using a mark-up language that is understood by WWW browsers. There are a number of these mark-up languages, but by far the most common at present (July 2001) is HTML (Hyper Text Mark-up Language). HTML, like all other mark-up languages, comprises a set of tags which are interpreted by a browser so as to produce a particular look. All HTML tags start with a < (less than) symbol and end with a > (greater than symbol); and are generally used in pairs. For example: Will cause the text "Hello World!" to be centered on a www page. Note that the closing tag has a `/’ (forward slash) after the >symbol. Table 1 gives the minimum amount of HTML required to embed an applet into a WWW page. Things to note about the HTML code presented in Table 1 are:
|
And that is all we need to know about HTML with respect to applets! |
<HTML> <HEAD> <TITLE>Applet Example</TITLE> </HEAD> </BODY> <CENTER> <APPLET code=AppletEx1.class width=500 height=150></APPLET> </CENTER> </BODY> </HTML> |
Table 1: Minimum amount of HTML required to embed an applet into a WWW page
3. OVERVIEW OF APPLETS AND FIRST EXAMPLE |
|
Right at the start of this module we said that there were two types of Java program: the stand alone application program (with its main method), and the applet (standing for small application). An applet is a java program that is intended to be invoked from within a WWW page; this is one of the great strengths of Java. However, java applets can only be invoked from a WWW page if the Web browser being used is Java enabled, i.e. it has a JVM (Java Virtual Machine) embedded within it. When working with applets we can make use of the applet package, which contains the most commonly required methods to create and manipulate applets. The Applet class is a subclass of the Panel, Container and Component classes found in the awt package which we met in the last seminar. To create an applet you must create a subclass of the Appletclass and include within it a method with the signature init(). The init() method is invoked automatically by the browser when the applet is "discovered". If you like you can think of init() as the applet equivalent of the main method used in java application programs. What we are doing in fact is overriding the definition of the init() method found in the applet package, i.e. providing our own version of it. |
An example applet is given in Table 2, this is actually the "beep" GUI example given in the last seminar but refined so that it will work from a WWW page. Note that user defined subclass of the Applet class must always be. The code fragments presented in bold type in Table 2 indicate those parts that have been altered from the original presented in the previous seminar. For the applet in Table 1 to work we of course need an appropriately written WWW page containing the name of the applet and its desired width and height. As luck would have it the HTML page presented in Table 1 is exactly what is required --- we will assume that the code presented in Table 1 is contained in the file appletEx1.html. Once compiled, to run the applet we can view it through an appropriately enabled WWW browser. Alternatively we can use the appletviewer program that comes with the JDK by typing: When you first invoke the appletviewer program you will probably be asked to agree to some copyright agreement of the form presented in Figure 1. Having done this you will be able to view your applet --- the result of the above should be as depicted in Figure 2. And that is all there is to applets! |
// Frans Coenen
// University of Liverpool, Dept of Comp. Sci.
// Friday 12 January 2000

import java.awt.*;
import java.applet.*;
import java.awt.event.*;

public class AppletEx1 extends Applet implements
                              ActionListener {

    // ----------------------- FIELDS --------------------------

    /* Buttons */

    Button pushButton = new Button("START");

    // -------------------------- METHODS -----------------------

    /* Init method */

    public void init() {
        setBackground(Color.yellow);
        setLayout(null);

        // Add push button

        addPushButton(pushButton,200,50,100,40);
        }

    /* Add push button */

    private void addPushButton(Button name, int width,
                           int height, int xCoord, int yCoord) {
        name.setBackground(Color.red);
        name.setForeground(Color.black);
        name.setLocation(width,height);
        name.setSize(xCoord,yCoord);
        add(name);
        name.addActionListener(this);
        }

    /* Action Performed */

    public void actionPerformed(ActionEvent event) {
        final char BELL = '\u0007';

        if (event.getActionCommand().equals("START"))
                                        System.out.print(BELL);
        }
    }
|
Table 2: First Applet Example
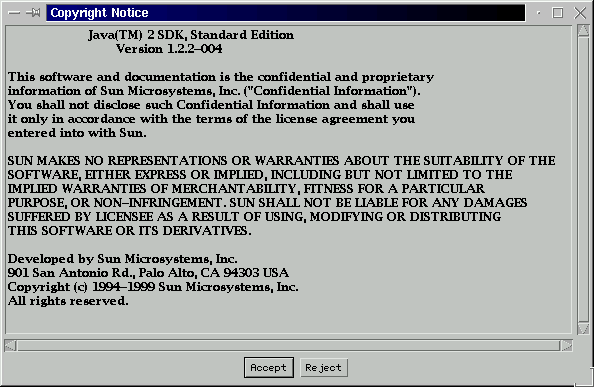
Figure 1: appletviewer program copyright agreement
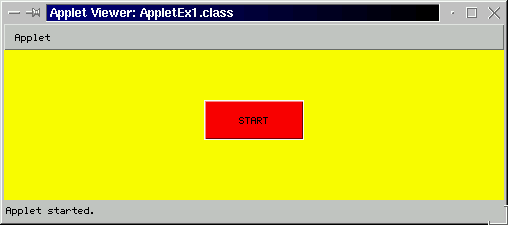
Figure 2: Result from running AppletEx1 using the appletviewer program
Created and maintained by Frans Coenen. Last updated 29 September 2001